6+ Best Software For Flashforge Creator Pro
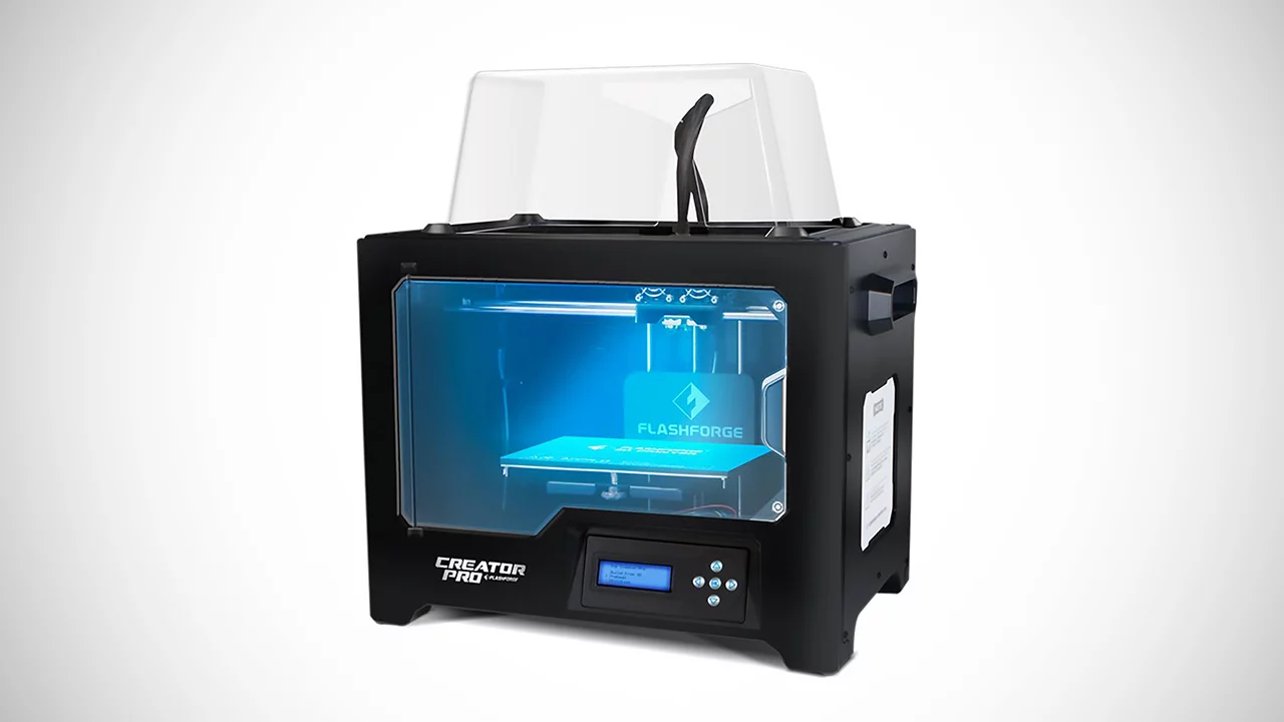
FlashForge Creator Pro is an amazing printer that allows you to create life-like 3D models. But to complement this amazing printer, you will need equally great software, which is where the best software for Flashforge Creator Pro comes in.
These tools will help you bring your ideas to life by quickly turning designs and sketches into printable files.
3D printing software is essential when it comes to printing. The software helps you fix errors, preview your model, and get print-time estimates and material requirements. They can even store and secure your models within easy to navigate libraries. In this article, we will be taking a look at The Best Software For Flashforge Creator Pro.
Which Is The Best Software For Flashforge Creator Pro
Flashforge Creator 3D Printers can be used to print objects with 3D printing software. To design the objects, you will need to have the right printing materials such as plastic software and 3D modeling software. Here is the best software for Flashforge creator pro:
- Simplify 3D
- Flashprint
- Slic3r
- Cura
- CraftWare
- 3DPrinterOS
1. Simplify 3D
- Cost – $140
Simplify3D is a popular 3D slicer that’s used by everyone from entrepreneurs to educators. Although it is a Slicer, it is a very expensive piece of software. However, it has more than 3D printing properties.
Simplify 3D, in addition to Flashforge Creator Pro supports 90% of desktop 3D printers on the market. This makes it future-proof in case you decide you want to buy a 3D printer from another brand.
Simplify 3D allows you to see the entire printing process displayed on your screen. You can also view individual layers or layers-by-layer previews.
You can see the entire 3D printer’s actions before the execution begins. This simulation can be used to identify flaws and issues, as well as help you fix them before they happen.
Simplify 3D offers support structures that are strong enough to hold your 3D models together. They can also be easily removed once the job is done. The support structure can be further customized to meet your needs.
Simplify3D also offers industry-leading resources, variable print settings, support for multi-extruders and FFF/FDM printing, multi-party customization and script engines, mesh analysis and many other features.
This software has more great features than any other slicer on the market, but it is equally costly and does not offer free trials.
2. Flashprint
- Cost – Free
Flasprint is a Flashforge in-house software that works with its 3D printers, including Creator Pro. It is free to download and install.
Flashprint claims it is easy to use can be used by novices and has enough advanced features for professionals. Although it may not be as advanced as Simplify 3D it makes a great beginner’s slicer to print 3D models.
Flashprint has many features, including the ability to control speed, temperature, thickness, and height for the first layer. After you are done, you can view layer-by-layer visualizations, time estimates, and material estimation.
The software automatically generates support structures based on the overhang angles of the model. You can add additional support manually, however.
You can print large models, which may not fit in the printer as one object. The tool has a cut and split function that allows you to break down the model into multiple parts and then assemble it.
To avoid dimension errors in the printing, it is possible to first test the error value and then enter the value in the software. This will ensure that you get better accuracy and lower error.
Flashprint also offers a unique feature: Flashprint can turn 2D images into 3D models. This allows you to save a lot of time and effort when you don’t have a 3D picture.
3. Slic3r
- Cost – Free
Slice3r is an open-source and free 3D printing software that lets you convert your 3D models to G-code (machine program) and then print the model.
For those who like the old-school execution, there is a command-line tool that can generate Gcode batch forms, export SVG slices and cut, transform, repair and convert 3D models.
Slic3r works with most 3D printers, including Flashforge Creator Pro. It is easy to use the intuitive interface and it does not confuse first-timers.
The slicing process is also faster than other 3D printers thanks to 100x faster Gcode generation.
Sequential Printing allows you to print one object entirely in one printing job. Drag-and-drop is used to place the objects onto the plating interface. You can further arrange the objects by using the rotate-and-scale function.
Slic3r also supports multiple input/output formats, cooling features, multiple printer administration, and micro layering. This allows you to print thicker infills to take advantage of low-layer heights without spending extra time.
4. Cura
- Cost – No Charge
Ultimaker, a company that makes 3D printers, offers Cura Slicer is free and can be used with any 3D printer offered by Flashforge Creator Pro.
It is very easy to use and takes only a few minutes to set up and run. The software integrates with industry-standard software to simplify your workflow and maximize productivity.
It is open-source and cross-platform. It has two modes: a custom mode that allows you to customize the properties of printing, and a recommended mode that automatically selects the best settings for your 3D printing task.
You can also use it to open file formats such as STL, OBJ and X3D. Plugins that allow for the integration of CAD software and third-party materials can be used to extend the functionality.
Cura cuts any 3D model into thin layers to print it. The simulation can be viewed in preview mode. You can adjust settings, scale them and then set the print job.
Cura is regarded as the second-best slicing program after Simplify 3D. Users who cannot afford Simplify 3D will find Cura’s functionality to be a great alternative.
5. CraftWare
- Prices – No Charge
CraftWare and Cura shares many similarities. CraftWare, a 3D printing cutter that allows you to host 3D printers and create 3D models, is free. CraftUnique developed CraftWare, and the company is also the maker of CraftBot Plus 3D printers.
CraftWare can be used with any 3D printer, including Flashforge Creator Pro.
The interface is simple and easy to use. It has a clear workspace and seems to be very beginner-friendly. You will find all the necessary transformation tools on the top, including auto drop, drop plane, select, move and scale.
CraftWare’s G-code visualizer allows you to view each layer by layer from every angle. You can identify any points that need to be modified and make the necessary changes before you continue with the printing process.
The structure allows for greater stability when working with 3D models. 3D model design can be imported in many formats, including .stl and obj. CraftWare also offers machine control, G code toolpath reversal, and the ability of loading and save g-code from other programs.
CraftWare, despite being free, offers all the features you need to create stunning 3D models using your printer.
6. 3DPrinterOS
The best 3D Printing cloud software available for FlashForge Finder 3D Printers is 3DPrinterOS.
3DPrinterOS is the best FlashForge Finder 3d printing software that can meet all your requirements and more.
This software allows you to remotely manage FlashForge Finder 3D Printers or entire fleets.
The magic begins before that though. It is possible to fix or orient your STL model. You can then slice it in the cloud with more than 300 parameters. All your 3D models, as well as Gcodes, will be saved in the system. Version control allows you to get back any modifications you made.
3DPrinterOS is the best option, whether you’re a hobbyist or a manager of whole fleets at universities or businesses.
How To Use The FlashForge Creator Pro With Different Slicing Software
Using the FlashForge Creator Pro with different slicing software like Cura, Simplify3D, and Slic3r involves adjusting settings and workflows for compatibility.
Here’s a guide on how to do it, along with a comparison of the pros and cons of each software and some tips for optimizing print settings and quality:
1. Using Cura with FlashForge Creator Pro
Pros
- Cura is free and open-source, making it accessible to a wide user base.
- It has a user-friendly interface with numerous customizable options.
- Regular updates and active community support.
Cons
Some advanced features may require more configuration.
Steps
- Install Cura and select “Custom FFF Printer” when adding a new printer.
- Configure your printer settings, including the build volume, nozzle size, and heated bed.
- Import STL files, position, scale, and rotate them as needed.
- Adjust print settings like layer height, infill, support structures, and print speed.
- Generate the G-code and save it to an SD card for printing.
Tips and Tricks
- Experiment with different layer heights for optimal print quality.
- Use the built-in profiles for FlashForge Creator Pro for a good starting point.
2. Using Simplify3D with FlashForge Creator Pro
Pros
- Simplify3D is known for its advanced features and high level of control.
- It offers a comprehensive support structure system.
Cons
Simplify3D is a paid software, which might not be suitable for all users.
Steps
- Add your FlashForge Creator Pro to Simplify3D using the “Tools” menu.
- Configure your printer settings, including the nozzle size and build volume.
- Import and manipulate 3D models as needed.
- Customize print settings, including infill, support, and layer thickness.
- Generate G-code and save it to an SD card for printing.
Tips and Tricks
- Take advantage of the powerful support structure options to minimize post-processing.
- Use Simplify3D’s extensive troubleshooting guide for fine-tuning.
3 Using Slic3r with FlashForge Creator Pro
Pros
- Slic3r is free, open-source, and has an active community.
- It provides comprehensive control over print settings.
Cons
The user interface is not as intuitive as some other software.
Steps
- Install Slic3r and configure it for your FlashForge Creator Pro.
- Set your printer’s specifications, including nozzle size and build volume.
- Import and position your 3D models within Slic3r.
- Customize print settings, such as infill density and layer height.
- Generate G-code and save it to your SD card for printing.
Tips and Tricks
- Utilize the “Printer” and “Filament” presets for FlashForge Creator Pro.
- Regularly check for software updates and community-contributed profiles.
4. Using Flashprint with FlashForge Creator Pro
Pros
- Flashprint is the official slicing software provided by FlashForge, ensuring strong compatibility.
- It’s known for its ease of use and simplicity.
- egular updates and improvements for FlashForge printers.
Cons
It may have fewer advanced features compared to other slicing software.
Steps
- Download and install Flashprint on your computer.
- Select the FlashForge Creator Pro as your printer from the list.
- Configure printer settings, including nozzle size and build volume.
- Import your 3D models and arrange them on the print bed.
- Adjust print settings, including layer height, infill, and support structures.
- Generate G-code and save it to your preferred storage medium for printing.
5. Using CraftWare with FlashForge Creator Pro
Pros
- CraftWare is known for its user-friendly interface and robust support for various 3D printers.
- It offers features for advanced users and detailed control over print settings.
Cons
CraftWare may not be as well-known as some other slicing software.
Steps
- Install CraftWare and set up your FlashForge Creator Pro as the printer.
- Configure printer settings, such as nozzle size and build volume.
- Import your 3D models, position, and scale them if needed.
- Customize print settings, including layer height, infill density, and support structures.
- Generate G-code files and save them for printing.
6. Using 3DPrinterOS with FlashForge Creator Pro
Pros
- 3DPrinterOS is a cloud-based slicing and management platform that offers remote printing and monitoring capabilities.
- It’s user-friendly and suitable for collaborative and remote 3D printing projects.
Cons
3DPrinterOS may have subscription fees for certain features and services.
Steps
- Sign up for a 3DPrinterOS account and connect your FlashForge Creator Pro to your account.
- Upload your 3D models to the platform.
- Configure print settings, including layer height, infill, and support structures.
- Use the cloud-based interface to generate G-code files.
- Initiate and monitor prints remotely through the 3DPrinterOS platform.
Tips and Tricks for Using These Slicing Software
- Regularly check for software updates to ensure compatibility with your FlashForge Creator Pro.
- Experiment with different print settings to achieve the desired quality and performance.
- Utilize user communities, forums, and customer support for each software to seek help and share experiences.
How To Print With Different Materials And Colors On The Flashforge Creator Pro
Printing with various materials and colors on the FlashForge Creator Pro can be an exciting and versatile experience.
Here’s a guide on how to print with different materials, including PLA, ABS, PETG, TPU, wood, metal, and glow-in-the-dark filaments.
1. PLA (Polylactic Acid)
Advantages: Easy to print, low odor, and available in a wide range of colors. Ideal for detailed prints and beginners.
Disadvantages: Not suitable for high-temperature applications.
Printing Settings
- Extruder Temperature: 190-220°C
- Bed Temperature: 50-60°C (if using a heated bed)
- Print Speed: 30-60 mm/s
- Minimal retraction settings are generally sufficient.
2. ABS (Acrylonitrile Butadiene Styrene)
Advantages: Strong and durable, suitable for functional parts.
Disadvantages: Can warp and emit fumes during printing, so proper ventilation is essential.
Printing Settings
- Extruder Temperature: 230-250°C
- Bed Temperature: 90-110°C
- Print Speed: 40-80 mm/s
- Use higher retraction settings (around 6-10mm) to prevent stringing.
3. PETG (Polyethylene Terephthalate Glycol)
Advantages: Strong and impact-resistant, with good layer adhesion.
Disadvantages: Can be prone to stringing.
Printing Settings
- Extruder Temperature: 230-250°C
- Bed Temperature: 70-80°C
- Print Speed: 40-60 mm/s
- Adjust retraction settings to minimize stringing (around 4-6mm).
4. TPU (Thermoplastic Polyurethane)
Advantages: Flexible and elastic, suitable for rubber-like applications.
Disadvantages: Can be challenging to print due to flexibility.
Printing Settings
- Extruder Temperature: 210-230°C
- Bed Temperature: 40-60°C
- Slow print speeds (20-40 mm/s) and minimal retraction (1-2mm).
5. Wood and Metal-Filled Filaments
Advantages: Unique textures and appearance for decorative or artistic prints.
Disadvantages: Abrasive materials that may require wear-resistant nozzles.
Printing Settings
- Extruder Temperature: Follow the manufacturer’s recommendations (varies by brand).
- Standard bed temperature (if required).
- Varies by brand; test and adjust print settings based on material characteristics.
6. Glow-in-the-Dark Filaments
Advantages: Fun and unique for decorative or educational prints.
Disadvantages: May be more abrasive and require special cleaning of the nozzle.
Printing Settings
- Extruder Temperature: Follow the manufacturer’s recommendations.
- Standard bed temperature (if required).
- Varies by brand; test and adjust print settings based on material characteristics.
Dual-Color and Dual-Material Prints with IDEX System
- The IDEX system on the FlashForge Creator Pro allows you to print with two different materials or colors simultaneously. To create dual-color prints, design your model in a 3D modeling software that supports dual extruders and assign different colors to different parts of the model. The printer will then use the two extruders to create the multicolor effect.
- Adjust the settings for each extruder, including temperature and retraction, based on the material you’re using. Ensure proper leveling and calibration for the best results.
- Here’s an example: Printing a two-color logo with one color for the text and another color for the background.
Remember to thoroughly clean the nozzles when switching between materials to prevent contamination. Dual-color prints can add creativity and complexity to your 3D prints, making them suitable for various applications, from art to prototypes.
What Is Flashforge creator pro
The Creator Pro is a desktop FDM 3D printer with a dual extruder. Its metal frame and black anodized aluminum body ensure its durability. Through a heated metal build platform and heat-insulated metal enclosure, the printing quality is greatly improved. And the build area is 230*150*140 (mm).
The compatibility of various 1.75mm PLA and ABS filaments makes this 3D printer easy to use for first-timers or experienced users. Thanks to the open-source technology, the Creator Pro is featured with more possibilities in different applications.
The original Creator was widely acclaimed for its high performance, simple operation, and great value. The 2016 Creator Pro builds on this proven design with improved usability and additional features.
With better instructions, more stable parts, and a new user-friendly interface, getting started is easier than ever. All this makes the 2016 Creator Pro the ultimate 3D printer for anyone looking to bring their ideas to life.
What Is 3D Printing (The Best Software For Flashforge Creator Pro)
What is 3D printing, and why is it so important for us in this day and age of digital information? 3D printing is one of the most exciting emerging technologies of the 21st century, and its use is going to blow minds because it is a technology that is more than ten to fifteen years ahead of its time already.
Let’s get a basic understanding of this technology and its implications for the future.
3D printing is a revolutionary technology that has a lot of people excited. It is used in a wide range of industries including healthcare, engineering, and architecture.
What are 3D Printers? (The Best Software For Flashforge Creator Pro)
3D printers, also referred to as Additive Manufacture machines, are becoming hugely popular and are now on sale everywhere, from the big department stores to corner shops or even your local home decor shop. In short, they are devices that use a “stereolithography” process that can print objects from a vat of plastic resin up to 25mm thick.
3D Printers are usually classified according to their build material and technology, for example, their bed, material, extruder, and cooling system.
The most expensive printers are made of aluminum, titanium and even gold to ensure the best build quality. The cheaper printers are usually made out of plastics. On these cheaper models, only a single or two layers are built and the print quality is often sub-par as a result.
There are printers designed to work with ABS and PLA, but there are several other materials that are available for 3D Printing. Each printer manufacturer has its own unique material range and it is often difficult to find the right one for every application.
This article will discuss the top 3D printing software that is compatible with Flashforge Creator Pro. These tools are easy enough for beginners, but also powerful enough for professionals.
READ ALSO: 7 Best RIP Software – Easy To Use
Tips And Tricks For Optimizing The Use Of 3D Printing Software With The Flashforge Creator Pro
Optimizing the use of 3D printing software with the FlashForge Creator Pro can help you achieve better results and a smoother printing process. Here are some tips and tricks:
1. Choose the Right Software
Ensure compatibility by selecting software that works well with FlashForge Creator Pro. Software like FlashPrint or Simplify3D is often recommended.
2. Calibrate Your Printer
Regularly calibrate your 3D printer to ensure the bed and nozzle are properly aligned. This helps in achieving accurate prints.
3. Select the Correct Print Settings
Adjust print settings like layer height, print speed, and infill density according to your project’s requirements. Fine-tune these settings for optimal results.
4. Use Supports Wisely
Enable supports when necessary to prevent overhangs and ensure that complex geometries are printed accurately. However, avoid excessive supports as they can be difficult to remove.
5. Bed Leveling and Adhesion
Ensure the print bed is leveled correctly before every print to prevent issues with adhesion.
Use adhesion aids like painter’s tape, glue sticks, or specialized print surface sheets if needed.
6. Keep Filament Dry
Moisture can affect filament quality. Store your filament in a dry, airtight container with desiccant packs to prevent moisture absorption.
7. Monitor Print Progress
Keep an eye on the print job during the initial layers to ensure proper adhesion. Stop and restart if you notice any issues early on.
8. Firmware Updates
Keep your printer’s firmware up to date to access the latest features and improvements.
9. Optimize Cooling Settings
Proper cooling can help with print quality. Adjust the fan settings to avoid overheating and warping, especially for small details and overhangs.
10. Experiment with Print Orientation
Sometimes rotating or changing the orientation of your model can reduce the need for supports and improve the overall print quality.
11. Use High-Quality Filament
Invest in good-quality filament to ensure consistent and reliable printing results.
12. Maintain and Clean the Printer
Regularly clean the printer’s nozzle and other components to prevent clogs and maintain optimal performance.
13. Slicing Software Settings
Understand your slicing software thoroughly. Experiment with advanced settings to fine-tune your prints for speed and quality.
14. Practice Bed Adhesion Techniques
Experiment with different bed adhesion techniques, such as rafts, brims, or skirts, to find the one that works best for your prints.
15. Post-Processing
After printing, consider post-processing techniques like sanding, painting, or assembly to enhance the final appearance and functionality of your prints.
16. Keep Records
Maintain a log of successful print settings for different materials and models. This can save time when starting new projects.
17. Learn from Failures
Don’t be discouraged by failed prints. Analyze what went wrong and use those lessons to improve future prints.
18. Community and Forums
Join online 3D printing communities and forums to learn from experienced users and get advice on troubleshooting specific issues.
By following these tips and tricks and continuously experimenting and learning from your experiences, you can optimize the use of 3D printing software with your FlashForge Creator Pro and achieve better results with your 3D prints.
3D Printer Software Free
There are many 3D printer software free that are applicable to the 3D printing process. From designing parts to slicing them into G-code, you will love these 3D printer software free.
Are you looking for the best 3D printer software free? Try these great software packages for planning and managing your additive manufacturing projects for free.
Here are the best free 3D printing apps to learn, design, and print your new models at home.
1. PrusaSlicer
PrusaSlicer is a slicer software based on the open-source project Slic3r. It’s very similar in features to the original software, with some key additions. These include customizable supports, multi-material support, and smooth variable layer heights.
Created by Prusa, for Prusa. PrusaSlicer is a feature-rich, frequently updated tool that contains everything you need to export the perfect print files for your Original Prusa 3D printer. Native support for all Prusa printers ensures a flawless setup process and automatic firmware updates. The native file format for PrusaSlicer makes it easy to slice in one program and 3D print in another.
Prusa Slicer is a free, open-source slicer software. It brings all the latest optimizations and cutting-edge features of Slic3r to Prusa 3D printers.
PrusaSlicer may not be as widely used or instantly recognizable as Slic3r or Cura, but the software is arguably just as capable as the most popular 3D printers on the market.
And while the interface may not be quite as polished, users are sure to appreciate how easy it is to get started with PrusaSlicer even if they’ve never sliced a 3D model before. Once you do want to take a dive into its advanced features, there’s no shortage of settings and tools to tinker with.
2. ideaMaker
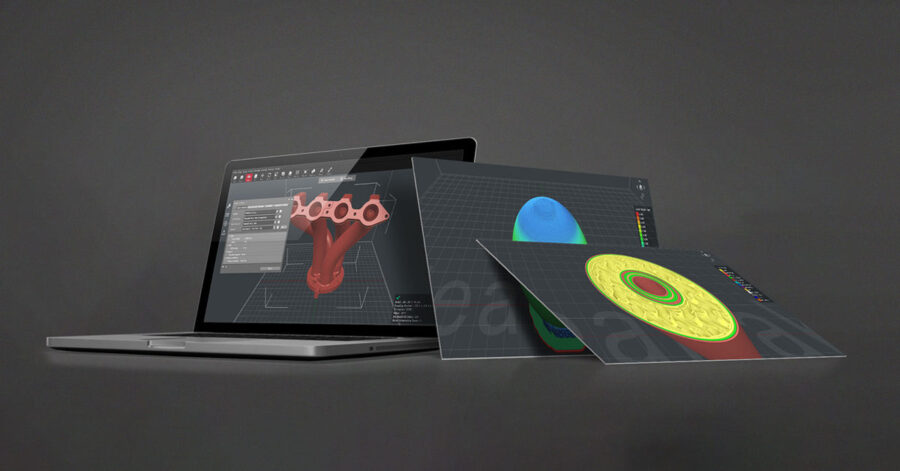
ideaMaker is a powerful integrated slicing application developed by Raise3D specifically for N-series 3D printers. Get started quickly with hundreds of Raise3D/community-developed profiles for models and materials as well as intuitive process control, remote monitoring, and alerts.
Other features include full Gcode file source customization, customizable presets for advanced users, multicolor printing support, auto-reloading of Gcode files in SD card after slicing, print time estimation and the ability to share slices to RaiseCloud.
ideaMaker provides a user-friendly UI and workflow, making 3D printing more accessible to all types of users, from beginners to experts. Advanced settings are separated from the core slicing functionality, offering easy access when needed, and bundled into “packages” that can be shared on Raise3D’s Community or installed directly through ideaMaker.
With ideaMaker, you can quickly and easily prepare your 3D models for printing. Import a model from a file or generate a quick test with the built-in design tools. Preview your model to check for errors, manually arrange multiple models onto the print bed, set advanced parameters such as supports or retraction and then send it to your printer with just one click.
3. ChiTuBox Basic
ChituBox Basic is a powerful slicing software used by most LCD-based resin 3D printers.
If you have ever used a resin 3D printer, then chances are that you’ll need to use ChiTuBox Basic, at least once. The software is the default slicer of choice for most resin printers, and while there are technically better options out there, but almost all of them come with a cost.
Chitubox Basic is a straightforward and easy-to-use program designed to help you generate layer-based G-code files for your 3D prints. Its user interface is quite intuitive and it’s easy to navigate through the different menu items.
ChiTuBox Basic is pretty good. It’s easy to use and has the important features we look for in a 3D printing software package, most notably automatic support generation. The interface could do with some work, but we have to say it’s a solid choice for anyone looking for their first 3D printing slicer.
4. Lychee Slicer
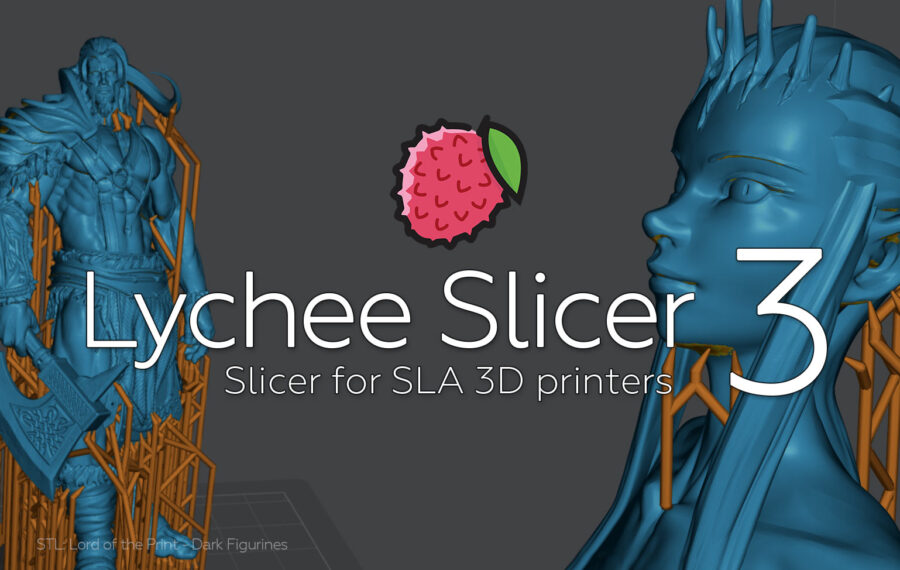
Lychee Slicer is a third-party option for your resin slicing needs. This slicer boasts a large number of 3D printers and resin profiles, as well as a slick, easy to follow, and feature-rich experience in desktop resin printing.
Lychee Slicer’s automatic model orientation helps get you started with model preparation, with support options to follow. If you are feeling lucky, you can hit the “Magic” button and Lychee Slicer will take care of everything.
Easily turn your 3D model into a print file with this intuitive slicer. Slice and export files for printing, view the preview in the handy integrated viewer and even estimate how long the physical print will take to complete. With support for different file types and some of the most popular slicers available, you can create high quality prints every time.
5. Kiri:Moto
The browser-based Kiri:Moto is a powerful file preparation tool. It’s written to run in-browser, and can be used to prepare items for 3D printing, laser engraving, or CNC routing. Although the settings are more basic than those found locally installed slicers, it provides most of what you’ll typically need – including retraction and settings.
If your computer doesn’t have a lot of storage space, you love to find new tools to use, or you want to use a slicer you can access from any device, then Kiri:Moto could be the tool for you!
Create your own prints or import designs from the web browser-based 3D printing slicer and G-code generator. It does support STL design files, but it goes far beyond that by supporting many file formats, such as STEP, IGES, OBJ, DXF, SVG, SVGZ and points cloud files.
6. IceSL
IceSL is a powerful tool to create quick and efficient 3d printable models. Not only can you create the models, but also slice them on a moment’s notice. And with it’s flexible slicing options, you’ll find that it’s easy to generate multiple iterations of your models, each with increased efficiency and reduced printing time.
IceSL would be perfect for beginners and advanced users alike. A stunning modeling interface gives access to impressive settings that allow you to slice your creations in ways you might never have thought possible.
Flashforge 3D Printers For Children
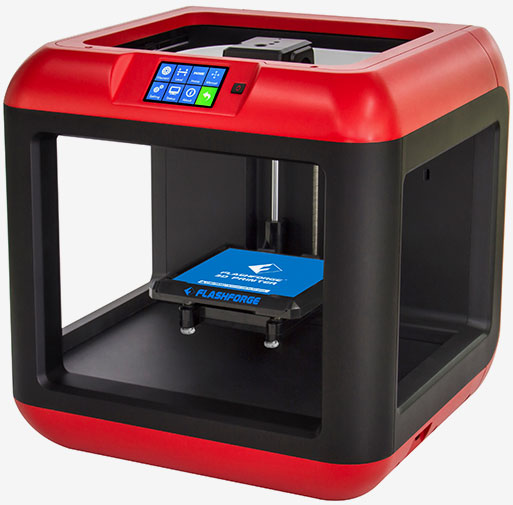
Finder is a nice and affordable printer for beginners. It is a good choice for kids, families, schools and even novice users.
With Flashforge 3D Printers For Children, exploring the exciting world of 3D printing is no longer intimidating. With its fun and simple operation, everyone can join in on the fun.
If you are seeking for a 3D printer for both adults and kids, we highly suggest the Flashforge Finder. It is affordable and easy to operate. Since it does not require a lot of tricky assembling and calibration, it will be more fun for your family members to learn more about 3D printing in the meantime.
Overall, the Flashforge Finder is a beautiful, affordable 3D printer that is great as a gift, or for schools and/or parents looking to get their little ones started in 3D printing.
Flashforge Adventure 3 Software
It’s very easy to get started with 3D printing. Flashforge adventure 3 software is designed for anyone and everyone to use – whether it’s at home, in school or in small workshops. Its lightweight build, easy-to-use touchscreen and Wi-Fi connectivity make it the perfect companion to bring imagination to life.
The 3D printing software controls all functions, such as leveling the build plate, preheating the extruder and loading filament. It has a compacted and closed printed chamber to keep the printing temperature stable.
The Adventure 3 is the first desktop 3d printer that integrates filament loading and unloading. Instead of manual filament loading, just insert the filament into the inlet until it reaches the nozzle and wait till it gets loaded to the nozzle automatically. Flashforge Adventure 3 will take care of filament loading and unloading for you.
With the auto filament loading system, filament feeding has never been this easy. The heatable ceramic glass print surface allows high-temperature printing and provides a smooth bottom surface of modeled objects.
The touchscreen is easy to operate. The functions on the 3D software are clearly displayed and make your control easier. It has a variety of third-party design platforms such as TinkerCAD, MakerBot and Thingiverse. In addition, FlashPrint provides the simplest slicing interface and allows you to build your own customized models.
Flash Download / Download Flash
To download flash, go to the official flash download page here.
What Software Do I Need For 3d Printing
3D printing software is the middleware that helps you to create a 3D model. With 3D modeling software, you can turn an idea into a solid object by building it layer upon layer.
The 3D printing software you choose will depend on the workflow that best suits your requirements. Some solutions focus on simplicity, while others are designed for specific tasks such as 3D scanning or file repairing. Let’s look at the best 3D printing software options today.
- Autodesk Fusion 360 – Overall best 3D printing software
- Ultimaker Cura – The best software for 3D printing for beginners
- Autodesk AutoCAD – The best software for 3D printing
- TinkerCAD – The best software for complex models
- MeshLab – The best software for 3D meshes
- Blender – The best open-source 3D software
Flashforge Finder Troubleshooting
Flashforge Finder troubleshooting? 3D printers are amazing devices, but sometimes things can go wrong. If you are currently printing a 3D model and you notice that the system has clogged, stopped extruding, or is simply making strange noises, it’s likely that something has gone off track. Don’t worry! You can easily fix your 3D printer.
Most issues are quite simple to fix with a few basic tools and a little patience. Learn how to troubleshoot your 3D printer so that it works exactly as you want it to.
Getting started with 3D printing can be a little intimidating. But don’t worry — our simple 3D printer troubleshooting guide will walk you through the most common problems, and teach you how to fix them in just a few easy steps.
Issue 1: Clogged Extruder/Nozzle
When your extruder starts making a horrible grinding noise and no filament is released, you have a clog. When thin layers or holes are visible in your finished model, you have an under-extruded part. The cause of these error states is often a partially clogged nozzle.
Fix #1: Your extruder is typically clogged because of improper loading or dust. First, remove the filament from your printer entirely. Then, heat the extruder to the melting point of the filament you use most or that you used last. With clean hands and a thin needle, try to draw out whatever is blocking inside the nozzle. You may have to try this more than once.
Fix #2: It’s possible that the nozzles can get clogged with filament over time. Luckily, try cold pulls to troubleshoot this issue. If you’re using a flexible filament, heat the extruder and nozzle to the temperature of the extruder, then manually push the filament through the extruder until it comes out evenly through the nozzle. This will work well in clearing most clogs.
Issue 2: Filament Won’t Stick to the Print Bed
The print bed is one of the harder things to level correctly, but making sure its level is extremely important. If the print bed is skewed so the distance from the nozzle to the bed on one side is different than on another, then that side will come out thinner or thicker than you expect.
Similarly, if your first layer height setting is wrong then this first layer may be too thin and not stick properly either. You should always make sure your first few layers are pressed down well and that your extruder isn’t dragging across the model and pulling it up as it travels around the bed.
Fix #1: Even though most 3D printers are carefully calibrated, it’s still not uncommon to experience bed adhesion problems. Make sure your first layer is carefully squished down and doesn’t have any gaps or air bubbles between the plate and model – even the smallest of gaps might lead to the model becoming dislodged later on.
If you’re still having problems, try hair spray or stick glue as an adhesion aid. Or use covering unheated beds in lightly textured tape, like blue painter’s tape.
Fix #2: Make sure that your print bed is level and that the nozzle is not far or too close to your print bed.
Fix #3: Reduce the print speed to allow the first few layers to let them cool off and adhere. If the problem still persists, try to lower the temperature of the extruder.
Issue 3: Stringing
When you’re done with a print, your model may look okay at first glance, but a closer inspection reveals that it’s covered in flyaway hairs of filament. These annoying strings are easy to remove if you’ve got tweezers and patience, or you can go in with a cutting tool to get the job done quicker, but sometimes they can still break apart into little fibers when pulled.
Fix #1: Ensure that you enable Retraction in your slicing software to pull back filament into the nozzle before you move the model across so that there is no left-over filament drawn between spots.
Fix #2: If after trying the first fix, the stringing still persists, increase the nozzle’s speed (not the print speed). When the nozzle moves quicker between areas of the model, therefore preventing strings to form.
Fix #3: In case the above two solutions failed to work, slow down the print speed and lower extruder temperature a bit at a time.
3D Printer Mac Compatible
If you have an Apple MacBook, HP laptop, ChromeBook and so on, you will want a high-quality 3D printer to go with it. Here is the list of 3d printer mac compatible.
- Creality Ender 3 V2
- Qidi Tech X-Max
- Artillery Sidewinder SWX2
- Creality CR-10 V3
- Anycubic Mega X
- Dremel Digilab 3D20
- Anycubic Photon Mono X
How To Use FlashPrint?
FlashPrint is the printer control and slicing software used for the Flashforge Finder. FlashPrint is a powerful 3D printing software that is easy to use, thanks to its fully responsive graphical user interface and its menu of intuitive icons.
Its interface was designed to help beginners quickly slice their models into printable files while providing highly advanced settings for experienced users who benefit from refined technical control.
Installation and Main interface Open your door to the world of 3D printing with the easy, reliable FlashForge Finder. The patented nozzle designed by FlashForge, equipped with fast heating function allows easy switch between filaments and prevents clogging.
With a build volume of 5.5 X 5.5 X 5.5 inches, this 3D printer is capable of producing high-quality prints for hobbyists, educators and small business professionals. If you are looking for how to use FlashPrint, here is the step-by-step guide you need.
Installing FlashPrint
When you buy your FlashPrint, it should come with a flash drive for installation.
- Insert the flash drive into your computer
- Search for the flash drive on your computer
- Open the FlashPrint folder on the flash drive. You should find 3 compressed FlasPrint versions (Mac.zip, Win82.zip and Win64.zip)
- Double click the right file for your operating system to install
You could follow this guide for a complete guide to use FlashPrint.
After installing and running the software the first time, it may prompt you to update to the latest software.
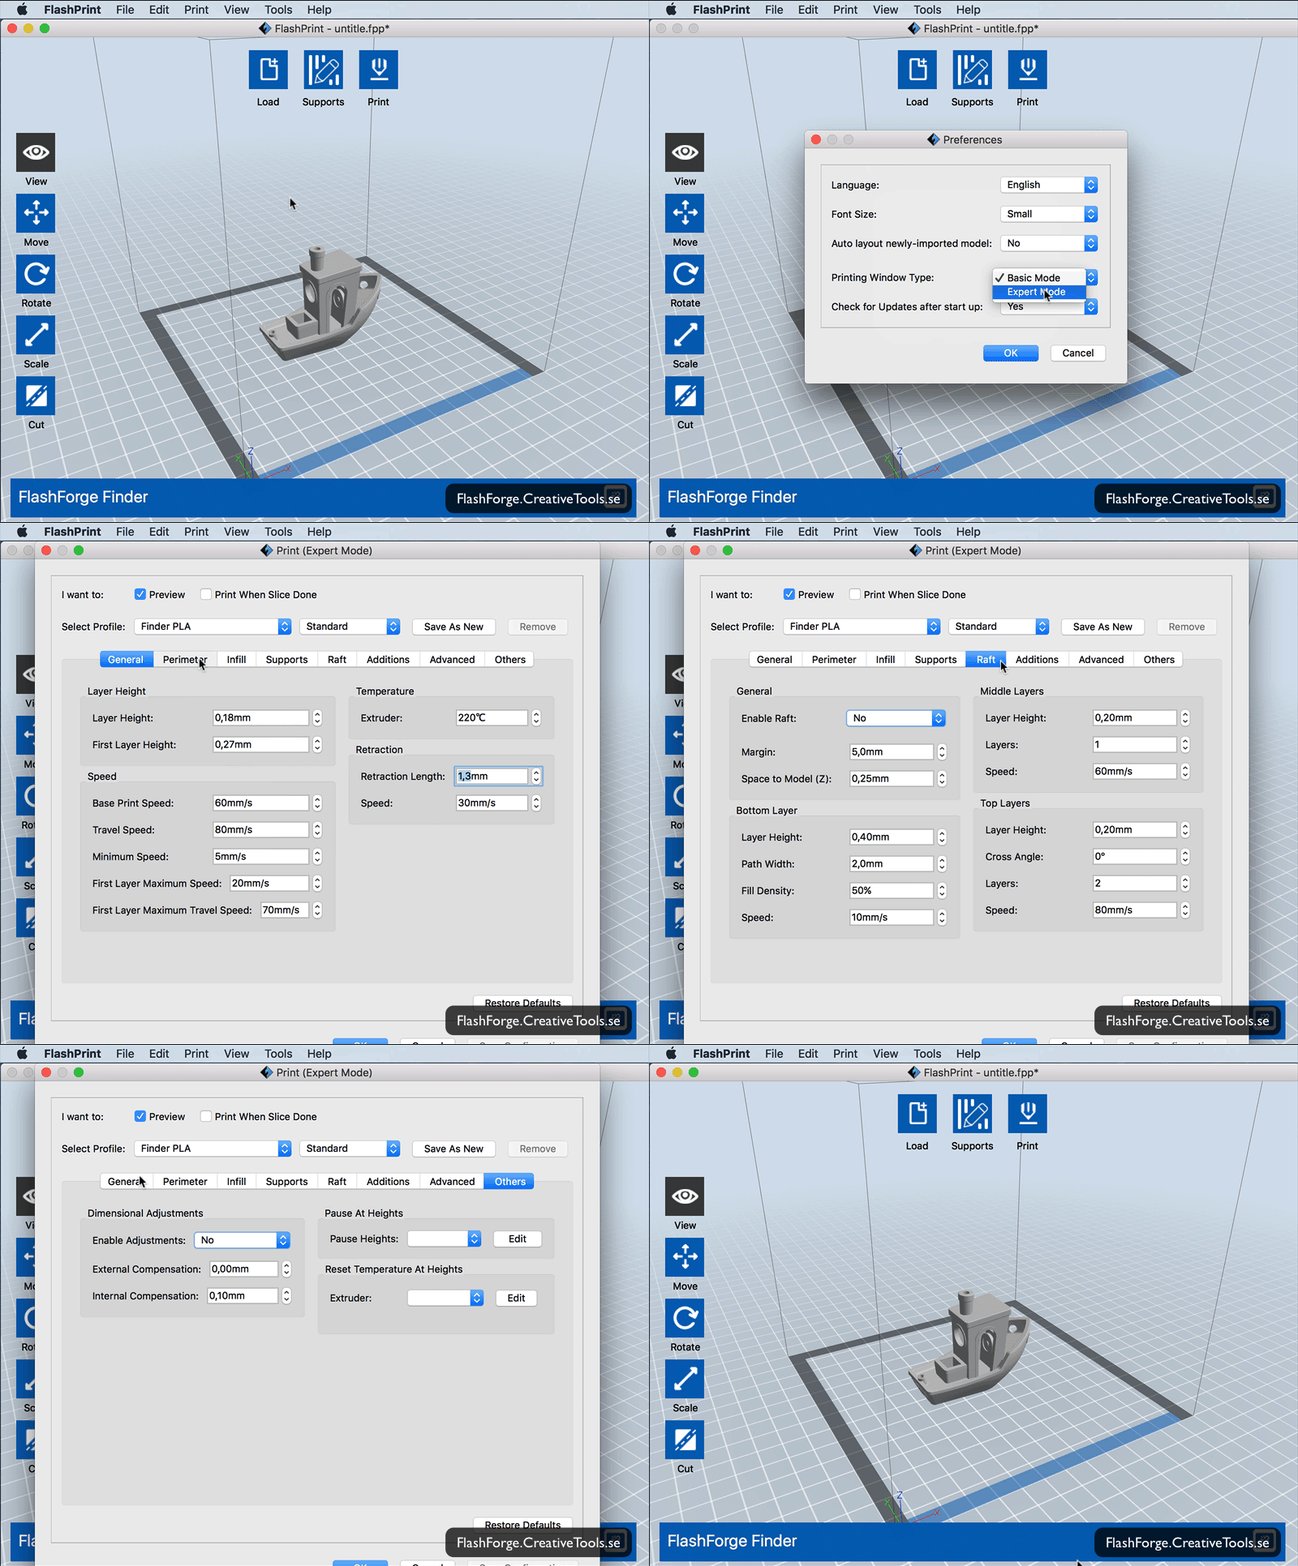
FlashPrint Expert Mode
If you are looking t switch to flashprint expert mode, follow this instruction:
- Open the file menu and choose Preferences
- Choose flashprint expert mode from the Print Window Type
- Press OK.
The following video could help
The Best Software For Flashforge Creator Pro FAQ
What is the FlashForge Creator Pro?
The FlashForge Creator Pro is a popular 3D printer known for its reliability and dual-extruder design, allowing for multi-material and multi-color 3D printing.
What software is compatible with the FlashForge Creator Pro?
FlashForge provides its own slicing software called FlashPrint, which is compatible with the Creator Pro. Additionally, you can use third-party slicers like Simplify3D or Cura.
Can I use free or open-source software with the FlashForge Creator Pro?
Yes, you can use free and open-source slicing software like Cura or PrusaSlicer with the FlashForge Creator Pro. Many users find these options to be highly capable.
How Do I Install And Set Up Slicing Software For The Creator Pro?
Installation instructions vary depending on the software you choose. Generally, you download and install the software, then configure it with the appropriate printer settings, including the Creator Pro’s specifications.
What Are Some Recommended Print Settings For Beginners?
For beginners, it’s advisable to start with default settings provided by the slicing software. Gradually experiment with parameters like layer height, print speed, and infill density as you gain experience.
Do I Need To Level The Bed Before Every Print?
Yes, bed leveling is a crucial step before every print to ensure proper adhesion and accurate results. Regular bed maintenance is essential.
How Do I Prevent Common Issues Like Warping And Stringing?
Issues like warping can be mitigated by using a heated bed and proper bed adhesion methods. Stringing can be reduced by adjusting retraction settings in your slicing software.
What Types Of Filament Are Compatible With The Flashforge Creator Pro?
The Creator Pro is compatible with various filament types, including PLA, ABS, PETG, and more. Ensure that the filament diameter matches your printer’s specifications.
How Can I Troubleshoot Failed Prints?
If you encounter failed prints, review your slicer settings, check for clogs in the nozzle, ensure proper bed leveling, and inspect filament quality and settings.
Are There Online Communities Or Forums For Flashforge Creator Pro Users?
Yes, there are online communities and forums where you can seek advice, share experiences, and find solutions to common problems. Popular platforms include Reddit’s r/FlashForge, the FlashForge official forum, and 3D printing communities like the Prusa community.
Can I Upgrade The Firmware Of The Flashforge Creator Pro?
Yes, you can upgrade the firmware to access new features and improvements. FlashForge typically provides firmware updates on their website.
How Can I Achieve Dual-Extruder Prints With The Creator Pro?
Achieving dual-extruder prints involves configuring your slicing software to assign different materials to each extruder. Consult your software’s documentation for guidance.
How does 3d printing work?
3D printing is a different process than traditional subtractive (or moldable based) printing. A 3D printer is required to print 3d materials.
After the 3D model is ready, the 3D printer uses the Slicer to convert the instructions into machine language. The 3D printer then executes the model layer by layer and creates the 3D model. This is how imagination can become reality.
3D printers eliminate the limitations of traditional printers, allowing you to create any object you want and make it a reality.
Flashforge offers its own 3D printing software for this purpose.
Can you use any software for 3D printing?
What software works with FlashForge?
Does Cura work with FlashForge Creator Pro?
The Creator Pro printer profiles work flawlessly with Cura 4.2.
Verdict On The Best Software For Flashforge Creator Pro
In a nutshell, you will be able to print your first model using any of the software above pretty easily. As you are using a 3D printing software for Foregeflash Creator Pro for the first time, remember that there is a learning curve involved. Before you send your print job for the machine, double check if all your settings are correct and get familiar with the interface.
This should help in preventing common errors from occurring and hence save you some time.
Simplify3D is currently the best choice software for Flashforge Creator Pro. It is a very professional 3D printing software that gives you complete access to every tool you need. And most importantly, with it you can make your Creator Pro more flexible and adaptable as a whole new level.
Let me know which 3D printing tool you prefer in the comments section. We would love to see your 3D printed models.
