LightBurn Software Review – The Best Laser Cutter Software?
If you are into laser cutting, you know that you need software like Lightburn software. In this lightburn software review, you will know why a lot of laser cutters love this Lightburn software.
Laser engraving is a sophisticated process that needs the use of the best laser engraving software if you really want to achieve your desired results.
To produce excellent and unique laser engraving, you need a special engraving matching that is controlled with the best laser engraving software.
Of course, there are many laser engraving software out there but Lightburn software stands out.
What Is LightBurn Software? (Lightburn Software Review)
Lightburn software is a powerful layout, editing and control software for your laser cutter. The software lets you import artwork in different formats including GIF, PDF, AI. SVG, PLT, DXF, JPG, PNG and BMP. Lightburn software is design, modification and interactive software for laser cutters.
With this software’s you can tweak settings in many ways. This feature of lightburn software makes it the most loved laser engraving software on the market. In fact, it sets the standard for other laser engraving software on the market. Here are some of the features that make Lightburn software the best on the market:
Lightburn Software Features (Lightburn Software Review)
Easy To Use And Unique
Lightburn is a popular laser engraving software for layout, editing and control software for laser cutters. With this software, you can :
- Arrange, edit and create new vector shapes within the editor, using the software’s powerful features like node editing, welding, boolean operations and offsetting.
- Apply settings such as power, cut order, number of passes, dithering mode, brightness & contrast, speed and much more.
- Import artwork in different variety of common image formats (e.g. PDF, AI, PNG, PLT, SVG, BMP, GIF, DXT) and vector graphics.
- Send results directly to your laser cutter.
- Lightburn software works perfectly with Windows, Mac OS and Linux.
Lightburn Software Is Design To Work With Your Laser
Specifically designed to work with all kinds of laser cutters, this software is designed to work with your laser without the use of additional software.
The software support GCode controllers including Marlin, Grbl-LPC, Smoothieware and Grlb. It also supports Ruida controllers such as RDLC-320A, R5-DSP, RDC6445G, RDC6332G and RDC6442G/S.
Lightburn also supports Trocean controllers like AWC708C, TL-3120 and AWC608. The owner of the software promises to add more, in case you don’t see yours listed.
If you use M2-Nano board in K40 laser, you may want to upgrade your board for it to work with lightburn software perfectly.
Lightburn Software pricing / Lightburn Software Cost (How Much Is LightBurn Software)
You will be wondering how much is LightBurn software? This software comes with three plans and all the plans come with a 30-day free trial. So, with the lightburn software cost and a free 30-day trial, it makes sense to try the software before buying it. So, how much is Lightburn software? Here are the pricing plans:
GCode License Key
If you are with GCode controller (DIY/hobby), this is the perfect Lightburn software license key for you. It costs $40 and it automatically unlocks a 30-day free trial for permanent use. The license lets you install the software on up to two computers, whether Windows, Mac or Linux.
When you subscribe to this license, the company will email your license to you within 24 hours. This GCode version of Lightburn software supports Grbl, Grbl-PLC, Marlin, Smoothieware and Cohesion3D based controller. If you are a user of Emblaser from Darkly Labs, you should purchase your license from them. Check it here.
DSP License Key
DSP License key is the right license key for users with DSP controllers. This license costs $80 and it automatically unlocks the 30-day free trial version of the software for permanent use. This license lets you install Lightburn software on up to two computers, whether Windows, Mac or Linux.
When you purchase this license, the key will be sent to you via email within 24 hours.
The DSP version of Lightburn software supports the following controllers:
- Trocen Anywells AWC 708c Lite and AWC 608
- Ruida (RDC6442G / S, RDC6445, RDC6332G, RDC6344S, RDLC-320, RDLC-220)
- Smoothieware (GCode based)
- Marlin (GCode based)
- TopWisdom TL-403CB, TL-410C, TL-A1
- LightObject R5-DSP, X7-DSP, and LO-E5
- Grbl / Grbl-LPC (GCode based)
Ruida and Trocen controllers can be found in the these machines:
- Aeon Laser Mira series (Ruida)
- Boss Laser LS (Ruida) & HP (Trocen) series
- Thunder Laser Nova series (Ruida)
- CamFive (Ruida)
- Voccell DLS / ST908 (Ruida)
- Laguna Tools (Ruida)
If you use Emblaser from Darkly Labs, you should purchase your license from them. Get it here.
Upgrade from GCode to DSP license
This license is for those who have purchased a GCode license but now want to use a DSP system. If that is you, you don’t need a new license as this license lets you switch to DSP from your GCode license. The license supports DSP controllers in addition to the GCode device. It costs $40.
It means you will still be able to use your GCode devices and DSP system with this license. However, if you have not already purchased a GCode license, you should not purchase this license.
Just enter your existing GCode license key (not trial ID) and your license will be updated manually (may be up to one business day) so that you can use both GCode and DSP systems.
LightBurn Software Requirements
Lightburn does not require a bespoke computer to work. In fact, you can use a low-end PC. Here are the Lightburn software requirements. The minimum operating system needed to run Lightburn is Windows 7.0 or later (32 or 64 bit), 64 bit Linux and MacOS 10.11 or later.
LightBurn Download Free And LightBurn Installation
Get your LightBurn download free here and start your 30-day free trial before you purchase the license permanently. After LightBurn download free, follow these steps to install it based on your operating system:
Installation For Windows
After downloading the software, launch the installer by double-clicking on it. Windows may ask if you trust the software. Pick yes.
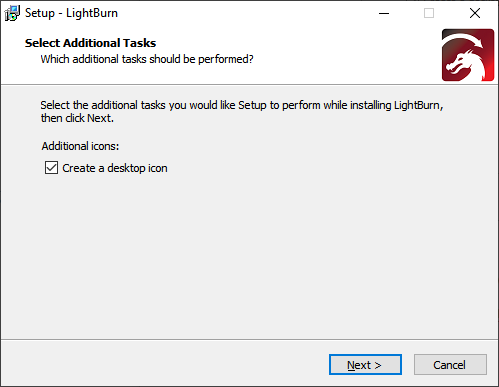
Click Next, followed by clicking Install. The installation will start and when it completes, you will see this.
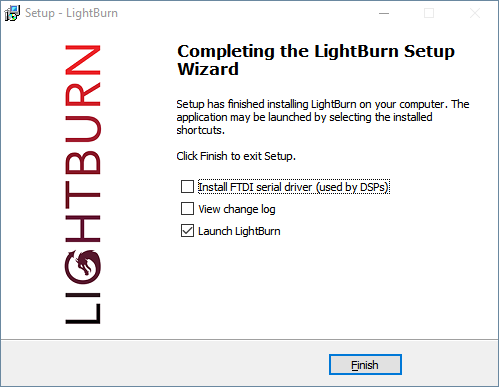
If you have not installed LightBurn before, check the Install FTDI driver button which is mostly used by DSP controllers such as TopWisdom and Ruida, and you only need to do this once. Anytime you update the software, you do not need to repeat this.
After finishing the installation, find the LightBurn icon on your PC and launch the program.
Installation For macOS
To install LightBurn on macOS is easy. After downloading the software, you need to tell macOS that you trust the software. You can follow this video for an easy installation
Installation For Linux
Follow these steps:
- Open a terminal and then run the next command
sudo adduser $USER dialout && sudo adduser $USER tty- After this, it is necessary to log out and log back in to refresh the permissions you have just added
- Download the Linux 64-bit version of LightBurn and either the
.runfile or the.7zand follow the steps below:
.run installer
- Open the terminal and
cdto the directory, the file is downloaded to - Run
bash ./LightBurn-Linux64-v*.run - The software will automatically install and you can check the LightBurn icon on your computer to launch it.
.7z installer
- Extract the folder to where you want Lightburn to exist
- Right-click
AppRun> Properties > Permissions > ‘Allow executing file as program’ - Double-click
AppRuninside your Lightburn folder
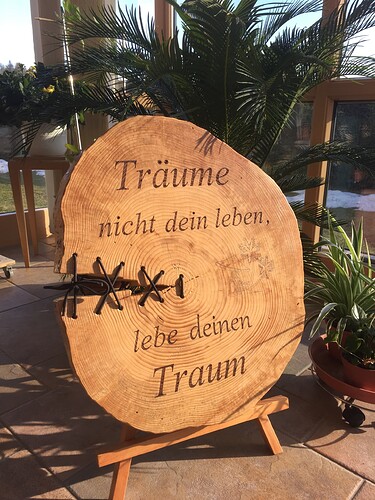
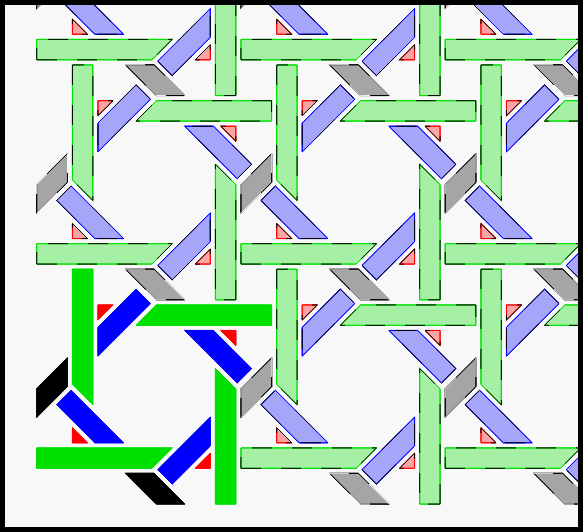
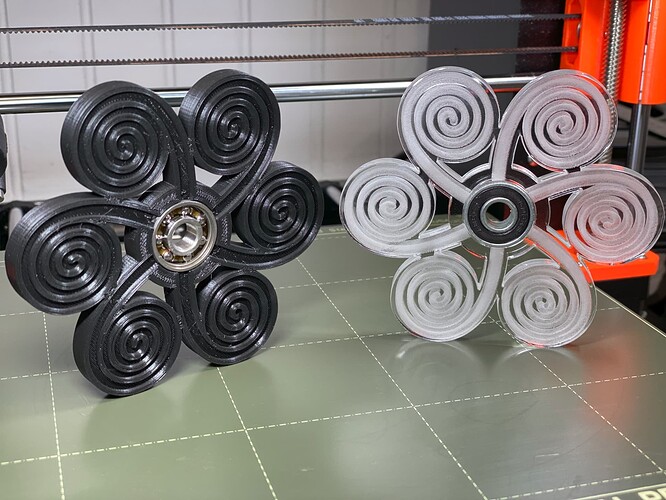
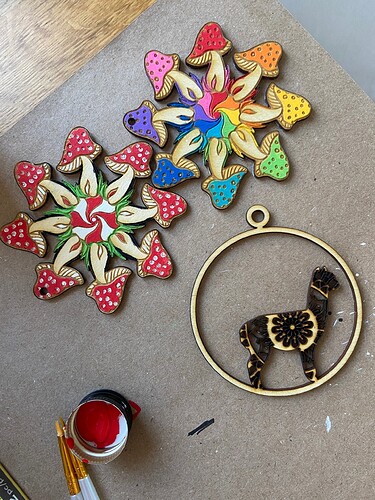
Lightburn Projects
Lightburn projects are numerous as a lot of people are using the software. Here are some of the most attractive lightburn projects that show you that Lightburn is the best in its field.
Laser Cutting Software Free Download
Laser cutting software is used to cut the materials with high precision and efficiency. It can be used in various industries such as manufacturing, architecture, engineering, and construction.
With the advancement of technology in recent years, laser cutting software has also been developed to make it more user-friendly. There are now different types of laser cutting software that are made for specific uses such as woodworking and metalworking.
Laser cutting software is a must-have for any woodworker. It allows them to cut, engrave, and carve wood with precision. However, not all laser cutting software is created equal. Some are highly specialized and will only work with specific materials while others can be used for a variety of materials.
Laser cutting software free download provides you the best option for novice woodworkers and engravers who don’t want to spend much money on buying the right one. If you’re looking for a versatile tool that can handle different types of materials, the following software is worth checking out.
LaserGRBL Vs LightBurn
| Aspect | LaserGRBL | LightBurn |
| Compatibility | Limited to certain G-code compatible lasers | Compatible with various laser brands/models |
| User Interface | Simple and basic | More advanced and user-friendly interface |
| Price | Free (Open-source) | Paid software with a free trial |
| Features | Limited features | Comprehensive feature set for laser control |
| Design Tools | Basic design features | Advanced design tools for vector and raster |
| Material Library | Not available | Includes a material library with settings |
| Vector and Raster | Limited raster support | Supports both vector and raster engraving |
| Camera Integration | Not supported | Offers camera integration for precise work |
| Workflow Efficiency | Basic workflow | Enhanced workflow for laser projects |
| User Support | Limited community support | Active community and official support |
| Updates | May have infrequent updates | Regular updates with new features and fixes |
LaserGRBL Vs LightBurn? As the world of 3D printing becomes more accessible, there are more people that are building their own machines. One of the most popular choices for a machine is the laser cutter.
For those who don’t know, a laser cutter is an industrial laser that uses a high-power laser beam to cut materials such as wood, plastic, and metal.
LaserGRBL and LightBurn are two popular software programs for controlling a CNC machine with a computer.
GRBL is an open-source project developed to be used completely free while LightBurn is a one-time payment CNC Software specifically created for laser cutting.
They both have similar features but differ in some aspects including compatibility with different hardware configurations and features such as support for g-code files without needing to use any other program to convert them into g-code files.
Both use the same g-code file format but LightBurn is specifically made for laser cutting. Generally, LightBurn sets the standard when it comes to laser cutting software. However, if you are looking for free laser engraving software, LaserGRBL is a great choice.
RELATED: How To Use Lightburn Software Without Hassle
RELATED: 7 Best RIP Software – Easy To Use
Workflow and Project Creation
Creating laser-cutting or engraving projects using LightBurn involves a structured workflow. Below, I’ll outline the typical steps in the workflow, along with some tips and tricks for efficient project creation:
1. Software Setup
Launch LightBurn: Start by opening LightBurn on your computer.
2. Machine Setup
Connect Your Laser: Ensure your laser machine is connected and properly configured. Make sure your computer recognizes the laser and it’s ready for communication.
3. Project Creation
Create a New Project: Click on “File” and select “New” to create a new project. Set up the project dimensions to match your workpiece size.
Import or Create Design: You can either import existing design files (such as SVG, DXF, or image files) or create your design within LightBurn using its design tools. To import, use the “File” menu and select “Import.”
4. Design and Editing
Design Tools: Use LightBurn’s design tools to create or modify your design. These tools include drawing shapes, adding text, and manipulating objects.
Layer Management: Utilize different layers to organize your design elements. Layers can help you control settings and order of operations.
Grouping and Ungrouping: Group objects together when they need to be treated as a single unit. Ungroup when you want to edit individual components.
5. Toolpath and Settings
Set Cutting Parameters: Configure the laser settings, including power, speed, and other parameters. You can adjust these settings for different layers or objects within the project.
Preview: Use the preview feature to simulate the laser’s path on the workpiece, ensuring your design and settings are as expected.
6. Optimization
Arrange Objects: Optimize the layout of objects on your workpiece to minimize material waste and reduce production time.
Optimize Paths: LightBurn automatically optimizes the toolpaths to reduce the time the laser spends moving between cuts.
7. Output and Send
Material Setup: Prepare the material and ensure it’s properly positioned within the laser’s workspace.
Send to Laser: When you’re satisfied with your design and settings, click the “Send” button to send the project to your laser machine. Make sure your laser machine is correctly connected and powered on.
8. Execution
Execute the Job: Start the laser job and monitor it to ensure it progresses as intended.
9. Quality Control
Inspect the Result: After the job is completed, inspect the result to ensure it meets your expectations.
10. Save and Archive
Save the Project: Save the LightBurn project file for future editing or replication.
Tips and Tricks for Efficient Project Creation
- Use Templates: Create and save project templates for commonly used settings and designs to save time.
- Test on Scrap Material: Before executing a job on your final material, always test settings and designs on scrap material to avoid mistakes.
- Material Library: Utilize LightBurn’s material library to quickly access optimized settings for various materials.
- Calibrate Your Laser: Regularly calibrate your laser machine to ensure it operates accurately.
- Record Settings: Keep a record of successful settings for different materials and projects.
- Check Focal Length: Ensure the laser’s focal length is correctly set for your material and job.
- Safety First: Always follow laser safety protocols and wear appropriate protective gear.
- Regular Maintenance: Maintain your laser machine as per the manufacturer’s recommendations to ensure consistent performance.
Following this workflow and implementing these tips will help you efficiently create laser-cutting and engraving projects using LightBurn.
Tips for Maximizing Lightburn Software Efficiency
Maximizing efficiency when using laser cutting or engraving software like LightBurn is crucial for achieving high-quality results and saving time and resources. Here are some tips to help you make the most of your laser projects and work more efficiently:
1. Plan Your Project
Before you start, have a clear plan for your project. Know the material, dimensions, design, and settings required for your laser machine.
2. Material Preparation
Properly prepare your materials. Make sure they are flat, clean, and securely positioned in the laser bed to avoid movement during the job.
3. Optimize Layout
Arrange your design elements to minimize material waste and reduce cutting or engraving time. Use nesting and efficient placement to make the most of your materials.
4. Material Settings
Maintain a library of optimized settings for different materials. Adjust power, speed, and other parameters for the specific material you are working with to achieve the best results.
5. Test on Scrap Material
Always perform test runs on scrap or similar material to fine-tune your settings and check for any potential issues.
6. Group and Ungroup
Group objects when necessary, but remember to ungroup them when you need to make individual adjustments.
7. Layer Management
Use layers to organize and manage your design. Assign different settings to layers to control the order of operations and laser settings for various elements in your project.
8. Save Templates
Create templates for common project types or materials. This saves time by allowing you to reuse optimized settings and designs.
9. Use Snap and Grid
Take advantage of snap and grid features to align objects precisely and maintain consistency in your designs.
10. Camera Integration
If your laser machine and LightBurn support it, use camera integration to precisely position and align your designs with real-world objects.
11. Shortcuts and Hotkeys
Learn keyboard shortcuts and hotkeys to quickly access common functions, saving you time navigating through menus.
12. Regular Maintenance
Maintain your laser machine as recommended by the manufacturer to ensure consistent performance and minimize downtime.
13. Backup and Version Control
Regularly back up your projects, settings, and templates. Consider using version control systems to track changes and revert to previous project states if needed.
14. Safety Precautions
Prioritize safety. Follow all laser safety protocols, wear appropriate protective gear, and maintain a safe working environment.
15. Community Support
Join online communities and forums related to laser cutting and LightBurn. You can learn from others’ experiences and get help with troubleshooting.
14. Stay Informed
Keep up to date with software updates, new features, and best practices. LightBurn and your laser machine may receive updates that improve efficiency and functionality.
15. Document Your Process
Keep a record of successful settings, materials, and project parameters. This can save time on future projects and serve as a reference for troubleshooting.
Efficiency comes with practice and experience. As you become more familiar with your laser machine and LightBurn, you’ll be able to streamline your workflow and produce high-quality results more efficiently.
Supported Laser Hardware For Lightburn Software
LightBurn software is known for its compatibility with a wide range of laser hardware, making it a versatile choice for laser control and design. It supports various types of lasers, including CO2 lasers, diode lasers, fiber lasers, and solid-state lasers.
Additionally, it is designed to work with many different brands and models of laser machines. While it’s not possible to provide an exhaustive list of all the supported laser hardware due to the ever-evolving market, here are some popular brands and types of lasers that are known to work well with LightBurn:
1. CO2 Laser Engravers and Cutters
- Boss Laser
- FSL(Full Spectrum Laser) Muse 3D 40W CO2 Laser Cutter And Engraver
- Omtech Polar 5OW CO2 Laser Cutter And Engraver
- Glowforge Pro 45W CO2 Laser Cutter And Engraver
- Gweike Cloud 55W CO2 Laser Cutter And Engraver
- xTool P2 55W CO2 Laser Cutter and Engraver Full Spectrum Laser
- Flux Beambox Pro 50W CO2 Laser Cutter And Engraver
- Red Sail
- CamFive
- Thunder Laser
- AP Lazer
2. Diode Laser Engravers
- Ortur Laser Master
- NEJE Master
- EleksMaker
- Wainlux
3. Fiber and Solid-State Lasers
LightBurn is also compatible with fiber and solid-state laser machines from various manufacturers.
It’s important to note that LightBurn regularly updates its software to add compatibility with new laser hardware, so the list of supported machines is continually expanding.
Before purchasing or using LightBurn with your specific laser machine, it’s advisable to check the official LightBurn website, documentation, or contact their support for the most up-to-date information on supported laser hardware.
Always ensure that your laser machine’s firmware and control board are compatible with LightBurn to achieve seamless integration and operation.
Lightburn Software Alternatives (Lightburn Software Review)
Here are seven of the best Lightburn software alternatives:
1. DraftSight Premium
DraftSight Premium, which is cost-effective, includes powerful 3D capabilities and features that enable businesses to meet laser cutting, drafting and manufacturing requirements.
This all-in-one solution is trusted by highly paid professionals to convert from 2D to 3D drafting and to synchronize with other services and software.
DraftSight Professional features are all included in this solution, as well as top-notch 3D capabilities.
The software integrates with popular software tools such as SOLIDWORKS PDM or 3DEXPERIENCE, allowing for smooth administration and collaboration of design files from modeling to prototyping.
3D modeling is one of its many features. It allows you to create 3D shapes and convert 2D into 3D solids. You can download the converted shapes in either sat or stl formats. They can also be printed or used in 3D solutions.
2. MeerK40t

MeerK40t, a complete, open-source laser software for Stock-LIHUIYI, can be run on multiple operating systems including Raspberry Pi, Microsoft Windows and Mac OSX.
It is written in pure Python and has a beautiful Graphical User Interface that contains powerful features to assist you with your tasks. It also has a CLI, which can be used to execute any project without any assistance from the GUI.
MeerK40t has many key features such as Multi-Language support, RasterWizard and simple Object Manipulation. It also supports multiple drivers, PPI Power modulation, bulk image import through drag-and-drop, high-resolution curve cutting, etc.
3. TurboCAD

TurboCAD is multilingual software that allows designers, manufacturers, engineers, and creators to create amazing projects.
TurboCAD is optimized for smooth operation on Microsoft Windows and Mac OSX. You can choose from separate editions, which are more or less expensive depending on their features.
Windows users have the option to purchase Pro Basic or Platinum editions, which include powerful tools for drafting and 3D mechanical and architectural design.
These editions are similar in that they can be used to create TC Surface Objects and Surface Meshes as well as ACIS Solids. The main difference between the basic and the platinum editions is the lesser tools in the Basic edition.
The Platinum edition is recommended for users who rely on mechanical and architectural tasks.
4. OpenBuilds CAM & Control

OpenBuilds CAM & Control is a major application that allows users to connect, manipulate and convert drawings for use in DragKnife’s, Plasma, CNC, or laser devices.
OpenBuilds Control makes it easy to connect and manipulate with the above-mentioned machines. It also assists in other tasks such as performing GCODE Jobs and deciding & setting Zero coordinates.
You can also Jog the machine you want and provide full configuration support for your Firmware.
OpenBuilds CAM, a robust web application, can be used in all modern web browsers. It converts Bitmaps, SVGs, and DXF Drawings into GCODE.
You can import Excellon, BMP, SVG and other files. It is easy to quickly create GCODE and then transfer it directly to OpenBuilds Control. You can also quickly set up tool paths for Laser & Plasma and Dragknives cutting.
5. LaserWeb

LaserWeb, a browser-based app that allows users to control and connect their Laser and CNC machines, is available.
You can also generate GCODE files from PNG, SVG, Bitmap, DXF and JPG files. LaserWeb offers separate installers for Linux and Microsoft Windows as well as Mac OSX.
The extensive documentation section provides information about Compatibility and Installation. You can also view videos on the platform to help you get familiar with all the features and how to use them in your projects.
6. LaserGRBL

LaserGRBL for Microsoft Windows, an open-source GCode streamer that allows DIY Laser Engravers to develop their GCodes using pure C# code.
It has several prominent capabilities such as streaming and processing the Gcode path to Arduino. The tool also includes a fully-fledged converter that allows users to engrave images, pictures and logos.
LaserGRBL, unlike other GUI applications, is optimized to work smoothly with a laser cutter or engraver. An engraver must allow power modulation using the S command instruction to fully unlock its potential. LaserGRBL is a high-performance alternative to T2laser, benbox and picengrave.
It offers many in-demand features that will help users meet their needs. It is capable of processing GCOde and job previews.
It can support jogging in all Grbl versions. There are many color schemes available that can be synchronized with multiple safety glasses. LaserGRBL’s intuitive GUI allows users to perform Speed or Power overrides.
7. Laser Draw

Laser Draw is a lightweight solution preloaded with low-cost Chinese cutters on eBay and Amazon. Laser Draw Extension is free software that is available to the public under GPL Version 2.
You will find many useful features in it, including the ability to save red and blue vector paths, store each file in zip format, separate designs based upon color, and ensure that your exported files retain their attributes when accessed via Laser Draw.
You can easily download the zip file from their website. You can also find helpful documentation on the site to help you with the installation process.
Lightburn Software FAQs (Lightburn Software Review)
1. What Is LightBurn?
Lightburn is a powerful editing, layout and control software for your laser cutter. It allows you to import artwork in various formats, including AI, PDF, SVG, DXF, PLT, PNG, JPG, GIF and BMP.
2. Is lightburn a One Time Purchase?
Yes. You pay once, the software will work forever as long as you have your license key.
3. Is Lightburn Software Good?
The software is by far the most user-friendly and versatile. LightBurn’s tools are able to create designs both for my laser and CNC and the software has replaced many other software and applications.
4. What Lasers Does Lightburn Work With?
LightBurn can communicate directly with your OMTech CO2 Laser Engraver, GCode or other DSP-controlled laser engraving machines. You can use its full set of composition tools to artistically arrange, edit and draw shapes to create stunning vector graphics for your engravings.
5. How Do I Use Lightburn Software?
Verdict On Lightburn Software Review
While there are many laser engraving software out there, Lightburn software stands out. The software works with so many machines and the developers are even adding more machines. If you are looking for all-in-one laser engraving software, look no further than this software.
The good thing is that you have nothing to lose as you can try Lightburn software for 30 days for free for you to decide whether it is good for you or not. Plus, the lightburn software cost is not outrageous.
What do you think? Let us know your thoughts on this software.
Acuity Scheduling Review – Is It The Best Scheduling Software?
Microsoft Malicious Software Removal Tools – What Do They Do?
NZXT Cam Software Review – Unleash The Full Potential Of Your Gaming Setup
About Author
admin
Nathaniel is a tech enthusiast and a passionate blogger. He writes tech blogs and reviews products. He is also a teacher who loves designing stuff on PowerPoint, Photoshop and creating videos and product images on Blender software